This video is where I got the inspiration to build our dance floor. I took the ideas presented in the video and tried to implement them in our home. Please note that the measurements presented in the video are in metric. I’ve tried to list the equivalent supplies below. Also, they install training mats (like those that would be used in a marital arts studio) over the top of their floor. My instructions detail how to install Marley type dance floor covering instead.
Materials
- Pool Noodles
- Glue/Adhesive
- 2″ x 4″ lumber – number depends on the size of the floor you are building
- 2″ x 3″ lumber – number depends on the size of the floor you are building
- Plywood
- 1/4″ or 1/2″ for the bottom layer (the layer the pool noodles will be glued to)
- 1/2″ or 3/4″ for the top layer (a higher quality, smooth plywood is the best option for this layer)
- Wood screws
- Double sided flooring tape
- Shower pan liner (or Marley type flooring) – Some examples:
- Non-slip flooring tape (for dance floors that are not permanent or semi-permanent and will be placed on a hardwood floor)
Instructions
STEP 1: Measure the location where the floor will be placed. This will help you determine how much lumber you will need to buy.
STEP 2: If possible, use a chalk line to snap out straight lines where the perimeter of the dance floor will be.
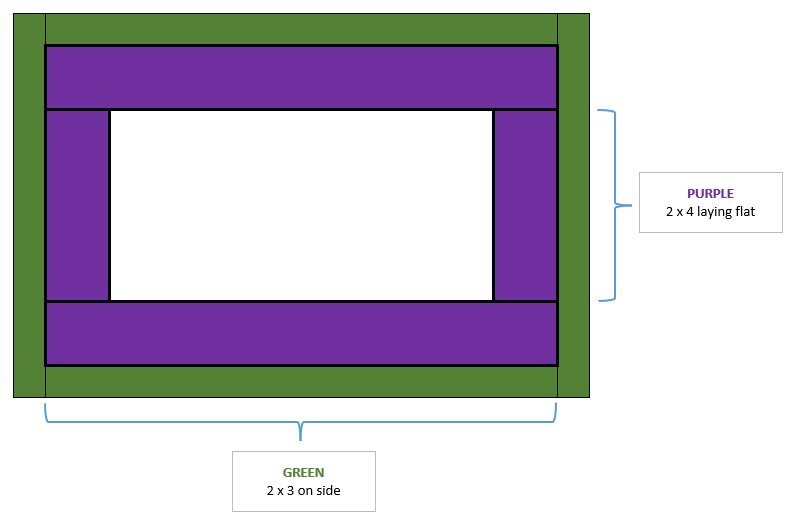
STEP 3: Cut and layout the 2″ x 3″ lumber on its side around the perimeter of your dance floor. (NOTE: You can also use 2″ x 4″ lumber here if you want.)
STEP 4: Cut and place the 2″ x 4″ lumber within the 2″ x 3″ frame. (NOTE: You can also use 2″ x 3″ lumber here if you want.)
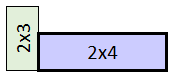
Depending on the size of your floor, you may need to overlap your joints. I would recommend doing something similar to this:
STEP 5: Use wood screws to attach the frame (step number 3 above) to the base boards (step number 4 above). Be sure to try to maintain square while doing this.
STEP 6: Measure and cut the bottom layer plywood to fit inside of the frame.
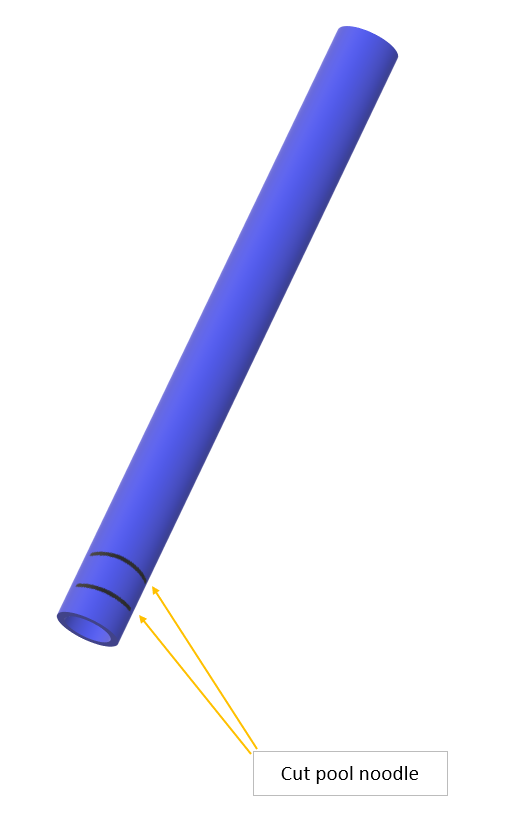
STEP 7: Cut the pool noodles to match the thickness of the 2″ x 4″ pieces (step 4)…they should end up being about 1.5″ slices. I would recommend using pool noodles that are at least 3″ in diameter for this application. I found the ones I used at my local Namco.
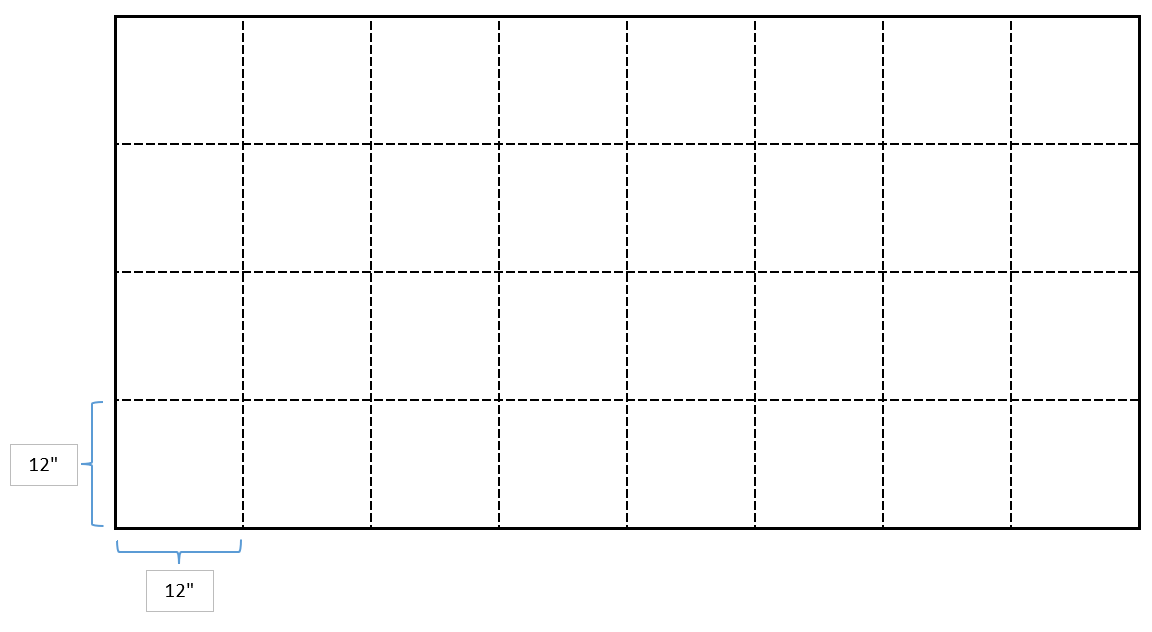
STEP 8: Layout a 12″ by 12″ grid on one side of the first layer of plywood. You can do this by either using a chalk line or by using a ruler/yard stick and a pencil or sharpie. This will help guide the placement of the pool noodles.
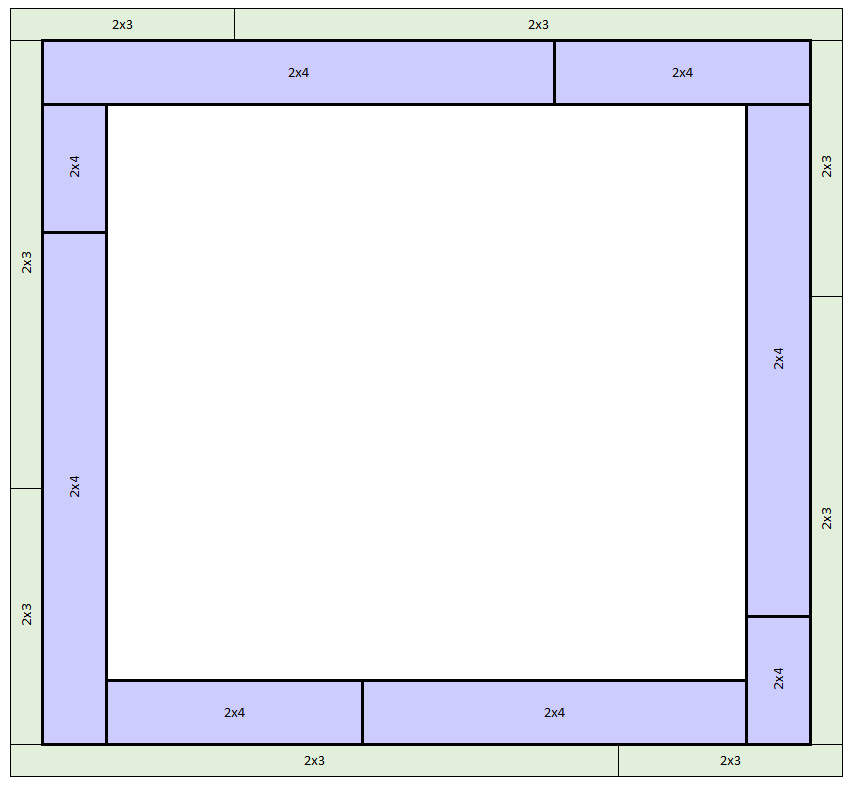
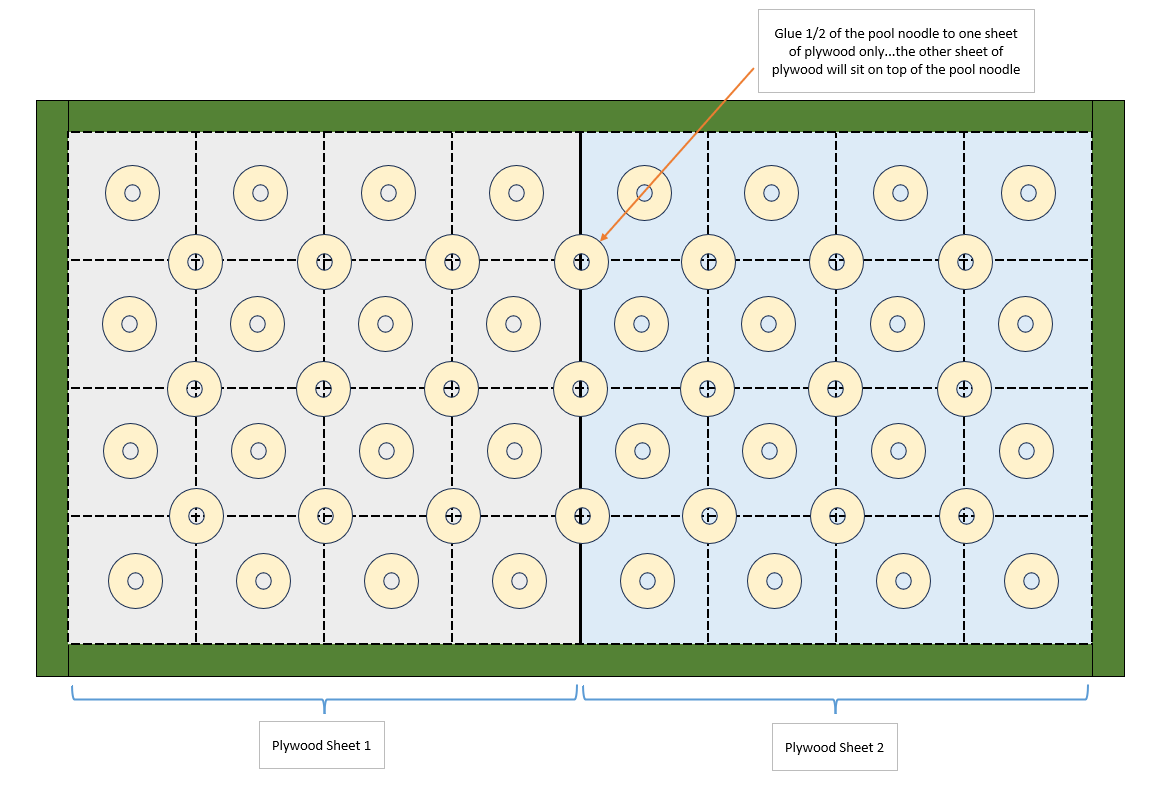
STEP 9: Start gluing the pool noodles to the plywood in a pattern similar to this…You can use any type of multi-purpose glue or adhesive for this application…just be careful to not get something that will eat the foam of the pool noodle. I used something similar to Gorilla Construction Adhesive for my application.

NOTE that in this diagram, the green section along the outside is the 2″ x 3″ frame that the plywood will sit inside.
If your floor is large enough, you may need multiple pieces of plywood. If this is the case, then you will glue the pool noodle slices to the edges of one of the pices of plywood. The other piece of plywood will then sit on top of the pool noodle half.
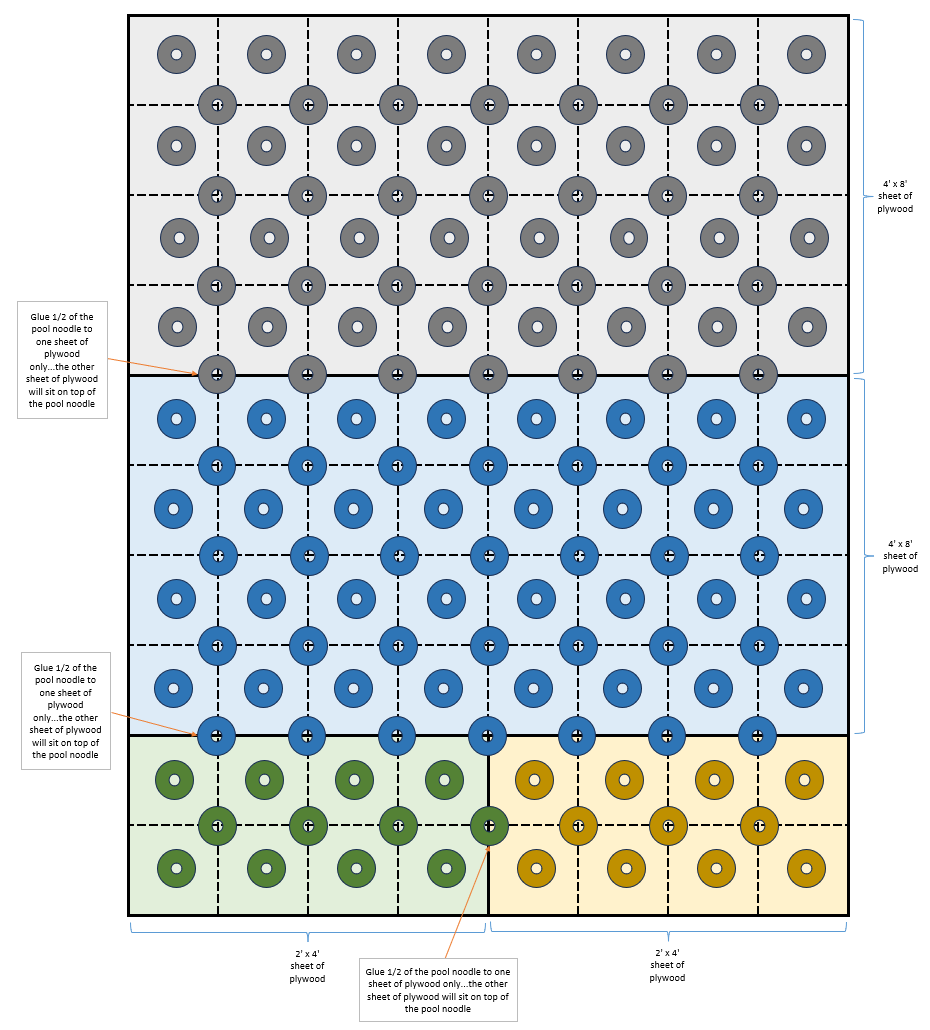
Our floor was 10′ by 8′ in total size. So, I ended up needing 4 pieces of plywood. Here’s how I laid out the pool noodles and how I placed the pool noodles along the edges:
Give the pool noodles about 24 hours to completely adhere to the plywood before continuing in the process.
STEP 10: Once the pool noodles are completely secured to the plywood, place the plywood, pool noodle side down, into the frame.
STEP 11: Cut and place the top layer of plywood within the frame. Be sure to overlap the joints of the base layer. So, if your plywood is laid out similar to this on the first layer:
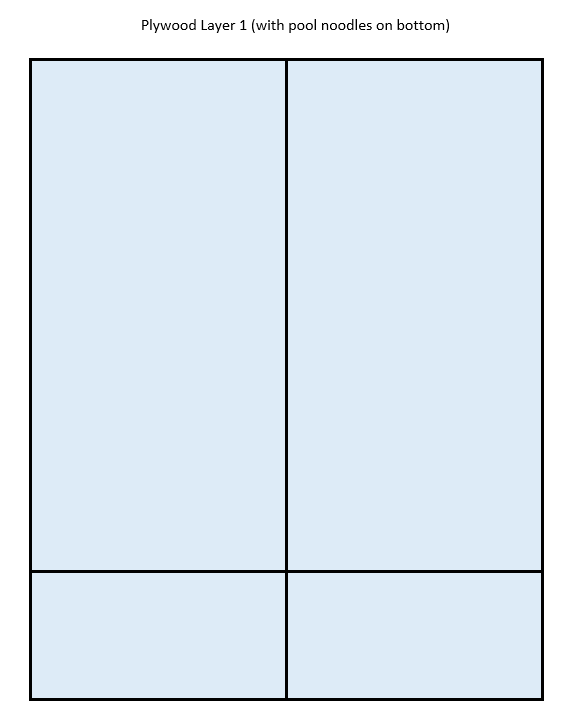
Then, place your top layer of plywood similar to this:
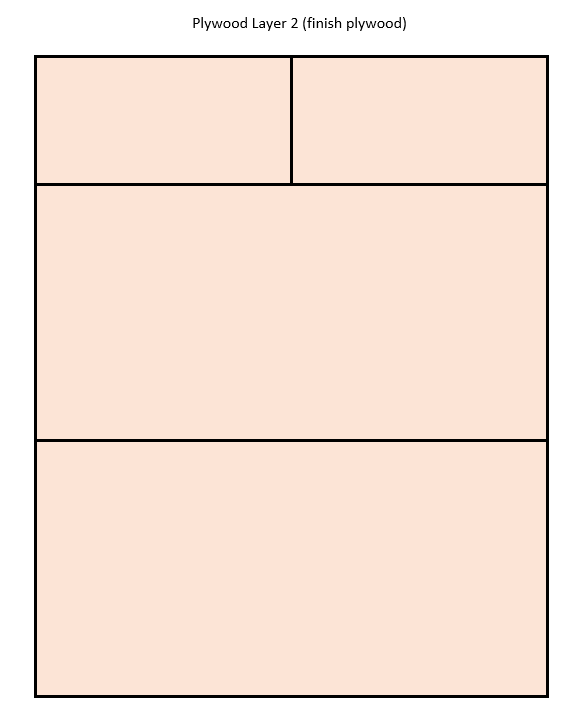
Overlapping the joints will help with keeping the floor from squeaking.
STEP 12: Screw the plywood in through both layers of plywood down into the 2″ x 4″ base. This will secure the plywood to the frame structure that you built before.

OPTIONAL: This step is not completely necessary, but it will mute the sound of hard shoes slightly and it will also provide a smoother and more uniform dancing surface:
STEP 13: Use the double-sided tape to attach the shower pan liner or Marley flooring to the top layer of plywood.
If you need to use multiple pieces of flooring (multiple pieces of shower pan liner), then place the double sided tape where the seam will be and try to get the seams as close together as possible.
HINT: If you buy shower pan liner and it comes folded, unfold and place the material outside on your driveway (or other outdoor flat surface) so that it can sit in the sun for a while. Being out in the heat will make the material easier to work with and also get out some of the wrinkles and folds. On a really hot day, you will see any folds and wrinkles completely disappear.
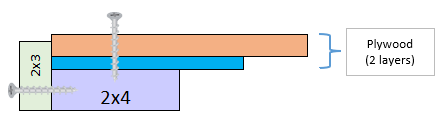
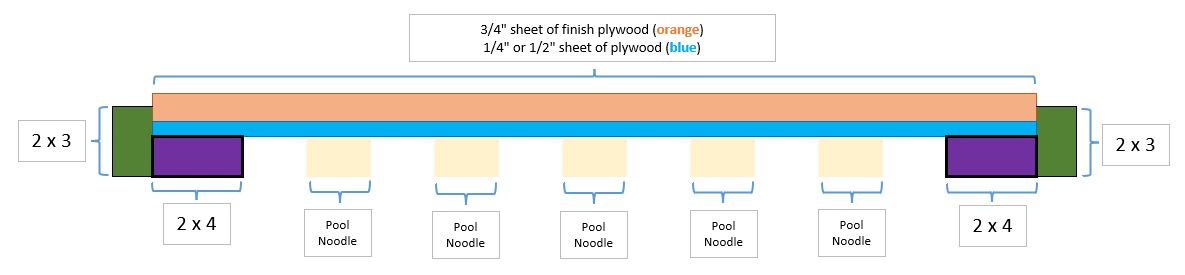
Here is a cutaway diagram to show the makeup of the floor from the side:
STEP 14: Have your dancer try out the new floor!
Additional Resources/More Inspiration!
Here are a few additional videos that also detail how to install sprung dance floors using pool noodles. They do things slightly different in these videos, so it’s interesting to see some additional options.